Making a crochet guinea pig is a fun and rewarding project. It's easy to do; you need a few tools like a crochet hook, some yarn, and a yarn needle. You can use different colors to make it look like your favorite guinea pig! Using your crochet hook, you'll create little loops and stitches with the yarn. This includes making a magic circle, a single crochet to build up, and increasing and decreasing stitches to shape your guinea pig. You'll fill your crochet with some soft stuffing to make it plump as you go along. The result will be a sweet, hand-made guinea pig that can become a cute decoration or a soft toy.
Crochet Guinea Pig Patterns

Crochet Guinea Pig Amigurumi
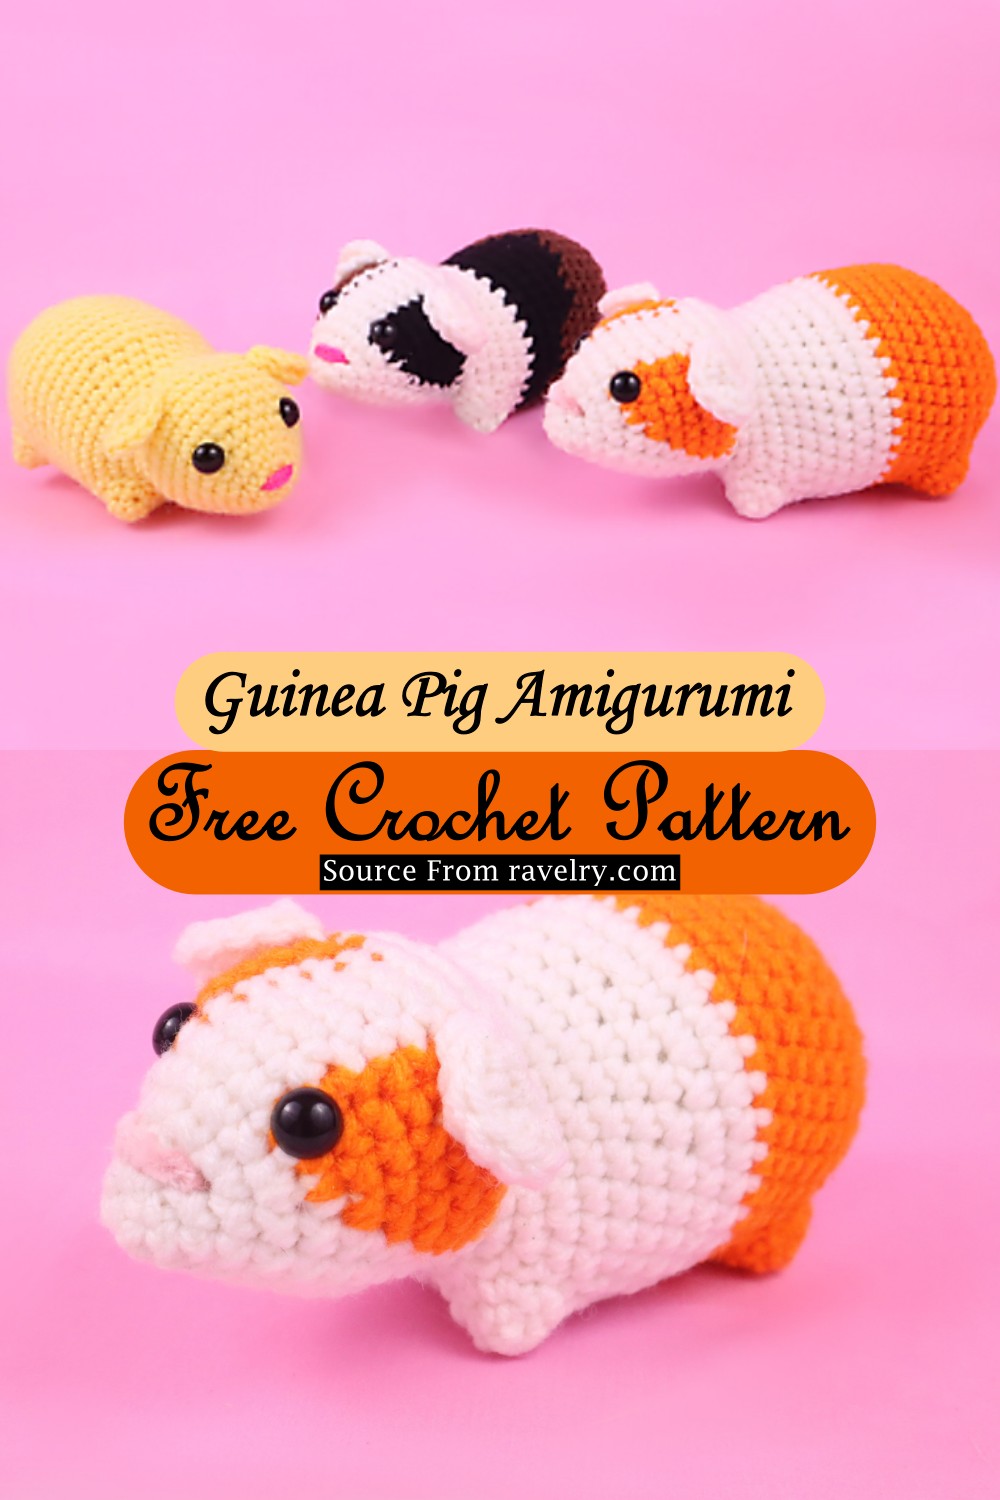
This delightful guinea pig amigurumi pattern captures the essence of charm, bringing a heartwarming spark of joy to every stitch.
Materials Needed:
Size 4/Medium Yarn in colors depending on the guinea pig version you wish to crochet:
- 1 Color Guinea Pig: 1 Main Color
- Black and Brown Guinea Pig: White, Brown, & Black
- Orange & White Guinea Pig: Orange & White
- 4mm Crochet Hook
- 8mm safety eyes
- Tapestry needle
- Scissors
- Stuffing
Difficulty:
- Easy
Size:
- 5.5" long, 2.4" tall
General Instructions:
You have 3 different guinea pig options to create with this pattern. The instructions are generally the same for each, with variations in color changes depending on the guinea pig version you choose.
Pattern Abbreviations:
- Sc = Single Crochet
- Inc = Increase (2 sc in the same stitch)
- Dec = Decrease (sc2tog)
- FLO = Front Loop Only
- BLK = Black (for a color change)
- BR = Brown (for a color change)
- WH = White (for a color change)
- OR = Orange (for a color change)
1 Color Guinea Pig Instructions:
- Begin with the Main Color
- Rounds 1-9 increase in size from 6 to 30 stitches.
- Position eyes using the markers placed during Round 6.
- Continue following rounds to shape the body, adding stuffing as required.
- Finish off by sewing the remaining stitches closed.
Black and Brown Guinea Pig Instructions:
- Start with White
- Follow similar steps to the 1 Color Guinea Pig for starting rounds.
- Introduce color changes in Round 6 as instructed (switching between BLK, WH, and BR as specified).
- Add eyes, then continue crocheting the body with color changes until Round 31.
- Finish similarly by sewing closed and stuffing adequately.
White & Orange Guinea Pig Instructions:
- Start in White
- Early rounds resemble the first two versions, with color changes introduced in Round 6 for OR and WH.
- Follow the pattern by incorporating color changes and positioning eyes.
- Complete the body with subsequent rounds, adding stuffing and finishing off as before.
Arms (Make 4):
- For the 1 Color Guinea Pig, use the main color.
- For the Black and Brown Guinea Pig, use 2 fronts in white and 2 backs in brown.
- Do the same for the Orange & White Guinea Pig.
- Round 1: 6 Sc into a Magic Ring (6)
- Round 2: Sc all around.
Important Notes:
- Add plastic beads in a secure bag (like a sock) and insert it into the body before closing to prevent the guinea pig from falling forward.
- Do not use this method for toys intended for babies or children due to choking hazards.
Crochet Cavy Corn
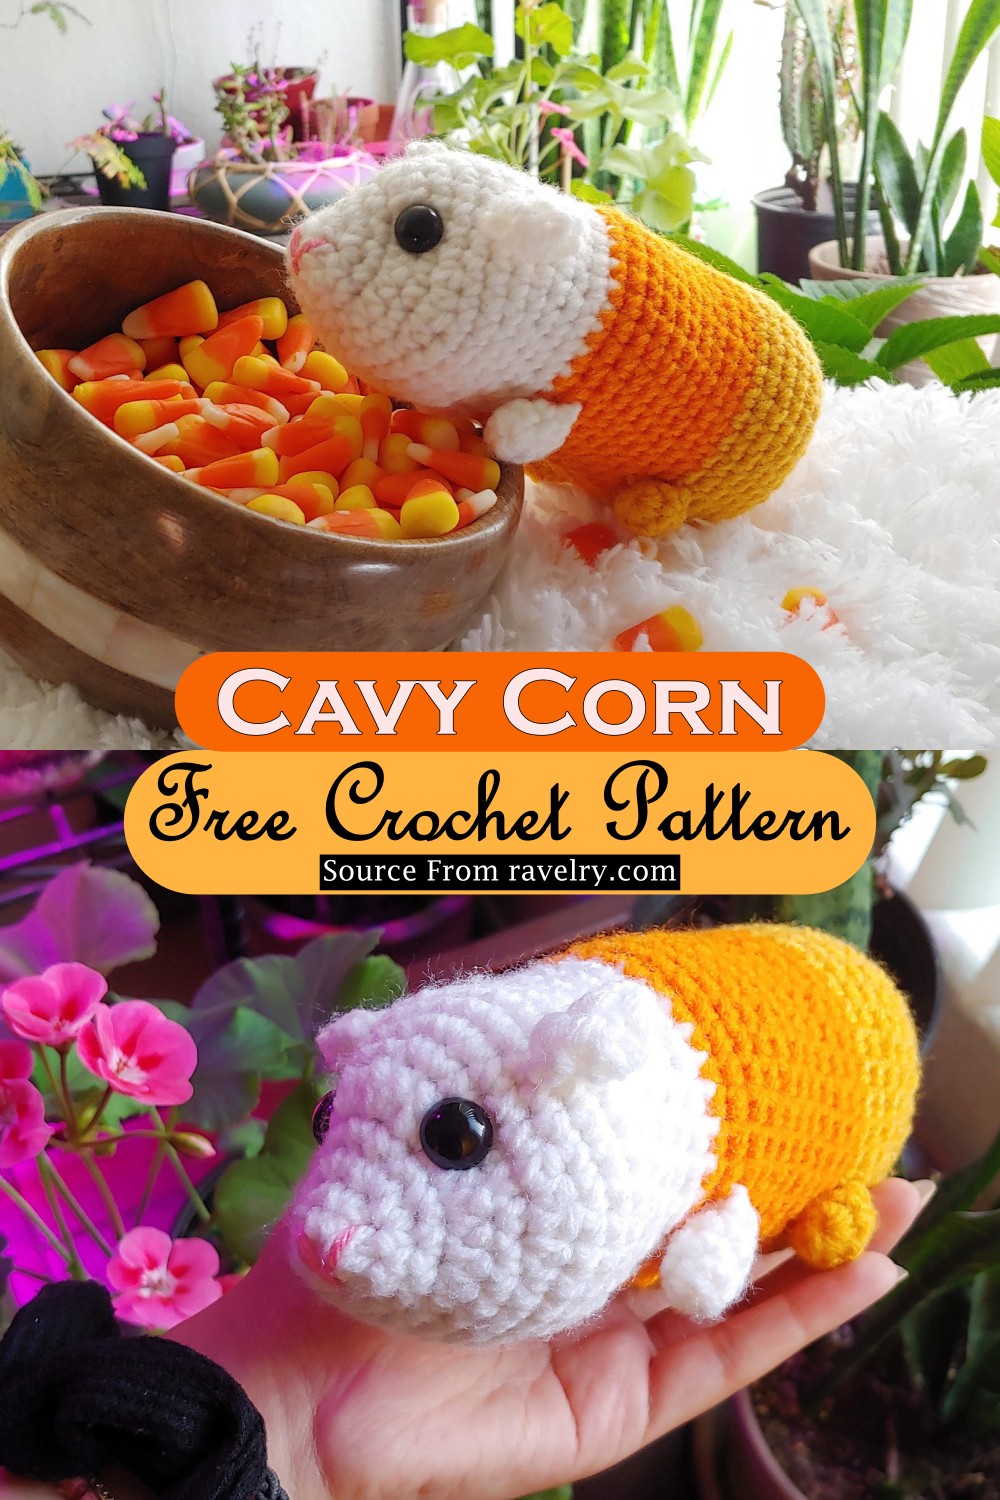
Explore delight in every stitch, and this Cavy Corn amigurumi pattern brings a magical touch of whimsy to any collection!
Materials Needed:
- 4.5mm Crochet Hook
- 12mm Safety eyes and their backings
- <1oz White yarn (Red Hearts Super Saver in “White”)
- <1oz Orange yarn (Red Hearts Super Saver in “Pumpkin”)
- <1oz Yellow yarn (Red Hearts Super Saver in “Saffron”)
- <12 inches of Pink yarn (Red Hearts Super Saver in “Baby Pink”)
- 1oz Fiberfill stuffing
- Yarn needle (metal recommended)
Abbreviations:
- MC: Magic circle
- Sc: Single crochet
- Sc inc: Single crochet increment (2 sc in the same stitch)
- Hdc: Half-double crochet
- Hdc inc: Half-double crochet increment (2 hdc in the same stitch)
- Sc dec: Single crochet decrease
- Sl st: Slip stitch
Pattern:
Starting with white yarn
- Round 1: MC, sc 7 (7)
- Round 2: 4 sc inc, 3sc (11)
- Round 3: 5 sc inc, 6sc (16)
- Round 4: sc around (16)
- Round 5: 10 hdc inc, 6 sc (26)
- Round 6: sc around (26)
- Round 7: 3 sc, 2 hdc inc, 4 sc, 2 sc inc, 4 sc, 2 hdc inc, 9 sc (32)
- Round 8-10: sc around (3 rounds) (32)
Switch to orange yarn, slst into the last stitch, ch 1, and work into the same stitch:
- Round 11: (3 sc, 1sc dec) X2, 6 sc, (1sc dec, 3 sc) X3, 1 sc (27)
- Round 12: 1 sc Dec, 21 sc, 2 sc dec (24) sl st and fasten off
- Round 13-15: Continue with orange yarn instructions as per the pattern
- Round 16-23: sc around (8 rounds) (32)
Switch to yellow yarn, sl st into the last stitch, ch 1 and work into the same stitch:
- Round 24 and 25: sc around (2 rounds) (32)
- Round 26-31: Continue with yellow yarn instructions as per the pattern
- Round 32-36: Finish the body as described in the pattern
Safety Eyes:
- Place after round 18 as described, creating indents where the safety eyes will go.
Ears:
- Repeat the ear pattern twice with pink yarn.
Snout:
- Use pink yarn to create a snout as directed.
Paws:
- Make 4 paws as directed and attach them to the body as suggested.
After completing these steps, you should have a cute Cavy Corn amigurumi!
Pixie Crochet Guinea Pig
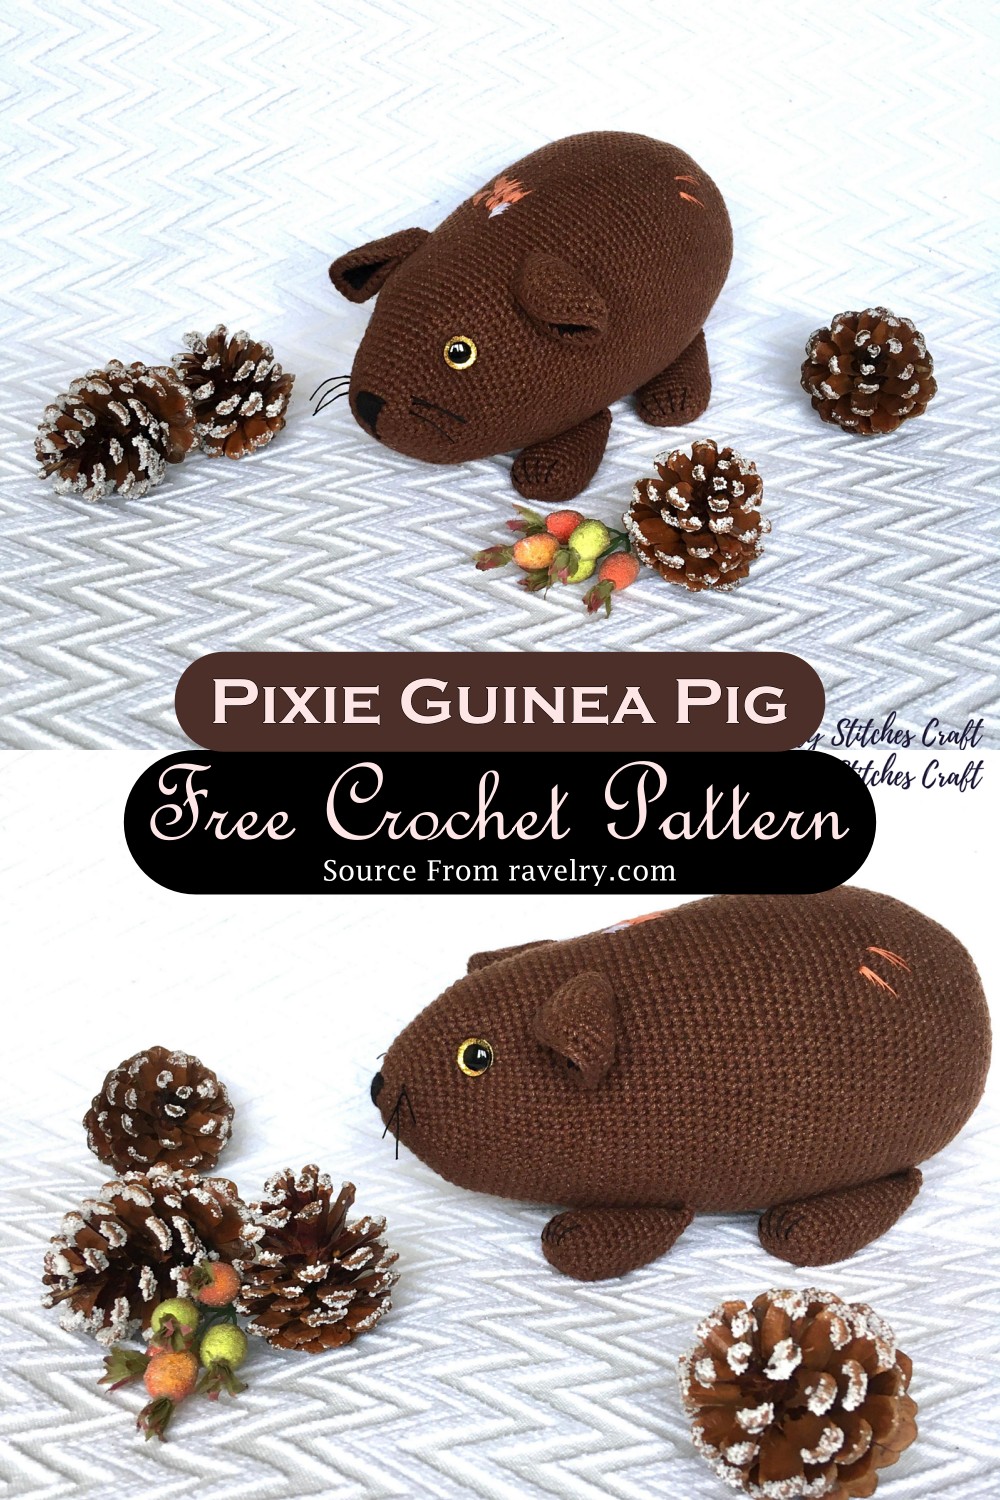
This Crochet Pixie Guinea Pig Pattern stands out as a masterpiece of creativity, encapsulating the charm and whimsy of our furry friends in every stitch.
Notes:
- Skill Level: Basic/Intermediate Crochet Skills and Knowledge
- Finished Size: Length: 21.5cm / 8.5 inches. Height: 13cm / 5 inches with a 3mm C/2 hook
Materials and Equipment:
- Yarn: Fine Sport #2 = 4 ply (55% cotton, 45% acrylic)
- 2x ball of brown yarn (50g/160m) – YarnArt Jeans – color 70
- 1x ball of black yarn (50g/160m) – YarnArt Jeans – color 53
- Other Materials: A long piece of thin black yarn for toe embroidery and whiskers, polyester fiberfill
- Crochet Hook: 3mm = C/2 (adjust according to yarn if using a different type)
- Other Equipment: Scissors, yarn needle, pins with large heads, stitch marker or thin yarn, 12mm safety eyes
Abbreviations Used:
- MR: Magic Ring
- ST: Stitch
- SC: Single Crochet Stitch
- HDC: Half Double Crochet Stitch
- DC: Double Crochet Stitch
- CH: Chain Stitch
- SL: Slip Stitch
- INC: Increase (two single crochet stitches in the same stitch)
- L INC: Large Increase (three single crochet stitches in the same stitch)
- INV DEC: Invisible Decrease
- BLO: Back Loops Only
- FO: Fasten Off
- The pattern repeats, and total stitch counts are provided in curly braces
{}and parentheses().
Crochet Pattern Simplified Overview:
- Ears: Crochet separate parts for the inside and outside, then join. Instructions include creating a magic ring, increasing, and stitching rounds to shape the ear.
- Head and Body: Start from the head, working towards the back of the body with continuous rounds of single crochet stitches, increases, and eye placement details for creating a lifelike guinea pig silhouette.
- Closing, Stuffing, and Finishing: This includes placing the eyes with a specific method for an "indented eye look" and detailed instructions for closing the amigurumi piece neatly.
- Front Legs: Starting with a chain, the pattern guides through rounds of single crochets to create the legs.
Notes for Success:
- Adjust hook size based on the yarn you choose to ensure the amigurumi doesn't have holes through which the stuffing can be seen.
- Safety eyes are recommended; however, for younger children, you might opt for embroidered eyes to avoid choking hazards.
- Experiment with different yarn colors to personalize your guinea pig.
Additional Tips:
- You can watch recommended video tutorials linked within the pattern for techniques like the magic ring, invisible decrease, and eye sculpting.
- Before finishing the head, the pattern suggests stuffing firmly and shaping as you go to achieve the best appearance.
- When placing eyes and performing the sculpting techniques, use pins to mark positions before finalizing placements.
Final Note:
This pattern is a charming project you can personalize with different yarn colors. It has engaging elements like sculpting for expressiveness and fine details for realism.
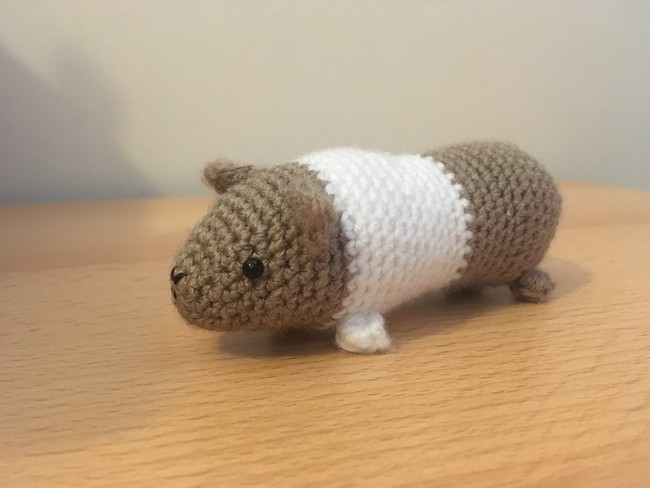
Little Guinea Crochet Pig Pattern
You will need
- Crochet hook
- Yarn needle
- Yarn (approx 20g or 60m)
- Black embroidery thread or 4mm safety eyes
- Soft toy filling
More information and tips
Stitches and abbreviations used:
- MC - Magic circle/ring (sc unless otherwise specified)
- Ch - Chain
- SC - Single crochet
- Inc - Increase stitch (2 single crochets into one stitch)
- Dec - Decrease stitch (single crochet 2 stitches together)
- DC - Double crochet
- ST - Stitch
- FLO - Front loop only
- BLO - Back loop only
- HDC - Half double crochet
- SLST - Slip stitch
- FO - finish off
- PC - Popcorn stitch
This is worked in continuous rounds. It is helpful to use a stitch marker to keep track. The number in brackets at the end of each round indicates the total stitch count for that round.
Use invisible decreases for a neater finished product. Stitches in brackets are worked into one stitch. Stuff with filling as you work.
Pattern
- Beginning at the nose in brown yarn, follow these steps:
- MC (4)
- Inc (8)
- 2sc, inc x4, 2sc (12)
- 4sc, inc x4, 4sc (16)
- 16sc (16)
- 8sc, inc x4, 4sc (20)
- 4sc, inc (24)
- 24sc (24) for rounds 8-9. Place eyes between rounds 6 and 7
- Follow the pattern 10 - 40+ provided in the website according to the same routine
Considering the length of the pattern, it would be best to follow the pattern step by step on the website as it is quite detailed.
Leave a comment