Explore the underwater world with crochet following our easy and fun fish patterns! You can try making cute little fish friends to add to your crochet collection. These patterns are simple, making it super fun to create adorable fish. Whether you're just starting or you've been crocheting for a while, you'll find our patterns easy to follow. We've put together a list of crochet fish patterns that guide you through each step to make your very own elegant fish amigurumi.
From choosing your yarn colors to making the last stitch, you'll enjoy seeing your fish take shape. Our guide makes it enjoyable to create these charming sea creatures, perfect for adding a splash of joy to your day or to give as thoughtful, handmade gifts.
Easy Crochet Fish Patterns

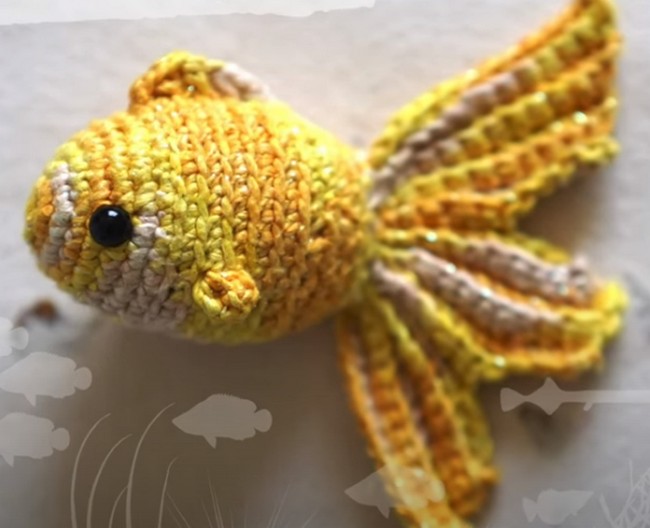
Crochet Goldfish Amigurumi
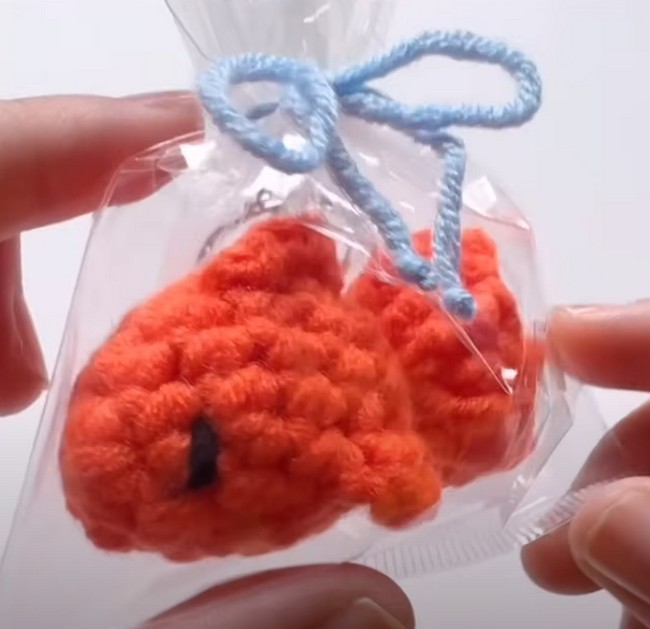
Let's put your hands on creating a charming little goldfish amigurumi. Perfect as a unique keychain or a whimsical addition to your home decor, this crochet project transforms a few simple materials into a cute, colorful fish encased in its very own plastic bag aquarium. Whether you're crafting for yourself or as a gift, this pattern allows for customization in size and color, making your crochet fish truly one-of-a-kind. The pattern is beginner-friendly and can be adjusted to suit different aesthetics by changing the yarn and hook size.
Materials Needed:
- Sports Yarn (or any preferred yarn type, size may vary with yarn choice)
- 3 mm Crochet Hook (adjust hook size according to yarn thickness for different size outcomes)
- Plastic Bag for creating the aquarium effect
- Keychain Ring
- Fiberfill for stuffing
- Yarn Needle for weaving in ends
- Scissors
- Optional: Safety Eyes or Black Yarn for eyes
Abbreviations Used:
- ch - Chain
- sc - Single Crochet
- hdc - Half Double Crochet
- dc - Double Crochet
- sl st - Slip Stitch
- st(s) - Stitch(es)
- [ ] - Repeat instructions within brackets as directed
Making Process of the Crochet Fish Amigurumi:
- Starting the Body: Begin with a magic ring. Make 5 hdc into the ring, pull tight to close. Join with a sl st to the first hdc to complete the round.
- Expanding the Body: For the second round, ch 2 (counts as first hdc) and make 2 hdc in each st around. You should have 10 hdc in total. Join with a sl st.
- Shaping the Body: Continue increasing in the next round by alternating one hdc in the first stitch and two hdc in the next stitch around. If you wish to introduce a second color (like white and orange for a goldfish), this is the round to incorporate that change.
- Body Continuation: For rounds 4 and 5, make one hdc in each st around. To maintain the two-color pattern, switch colors accordingly to match the sections.
Continue...
- Decreasing for Tail Preparation: Start round 6 with a decrease by making one hdc, then hdc two sts together around. This creates the tapered shape for the tail.
- Final Decreases and Closing: For round 7, transition to sc decreases around to close off the body. Stuff the body before completely closing. Finish off and weave in ends.
- Tail and Fins: Chain and follow the pattern of triple crochets and chains to create the delicate fan-like tail and fins. Attach them at the appropriate spots alongside the body.
- Adding Details: Attach safety eyes or embroider them with black yarn. For the goldfish's unique look, consider embroidering a mouth or other details according to your preference.
- Creating the Plastic Bag Aquarium: Use the plastic bag to recreate a miniature aquarium by inserting the crochet fish inside and securing it with a rubber band. Attach the keychain ring through a piece of yarn tied around the top of the bag.
- Final Touches: Adjust and reshape the fish as needed, ensuring it fits perfectly within its plastic bag aquarium.
This crochet fish amigurumi is not just a creative endeavor but a joyful expression of craft. As you hook through each step, imagine the smiles it will bring to faces, making all efforts absolutely worth it.
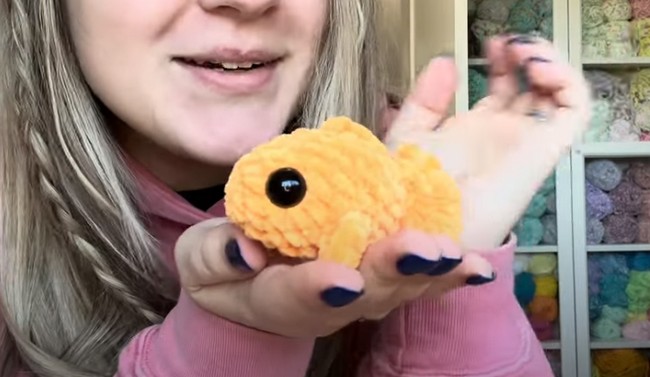
Easy Crochet Fish Without Sewing
Head on to a delightful project of creating a charming no-sew crochet fish. This amigurumi pattern is perfect for crafters of all levels who want to dive into the world of crocheted wonders without the hassle of sewing pieces together. Using simple stitches and the amigurumi technique, you'll be guided through the creation process from start to finish to bring a whimsical goldfish to life. Ideal for personal keepsakes or gifting to loved ones, this pattern results in a textured, cuddly fish that is sure to admire anyone who sees it.
Materials
- Yarn (medium weight or thin fingering yarn recommended)
- Crochet hook (size to correspond with chosen yarn; e.g., 3.25mm for medium weight or 2.25mm for thin yarn)
- Scissors
- Plastic safety eyes (6mm for smaller fish, 8mm or 9mm for larger fish)
- Stuffing material (fiberfill recommended)
- Stitch marker or scrap yarn (optional for marking the beginning of rounds)
Abbreviations
- MR – Magic Ring
- sc – Single Crochet
- inc – Increase (2 sc in one stitch)
- BLO – Back Loop Only
- dec – Decrease (sc two stitches together)
- st(s) – Stitch(es)
Making Process
- Head and Body: Start with a magic ring and work in rounds, increasing the number of stitches to shape the head. Continue with seamless rounds for the body, increasing and then maintaining stitch counts according to the pattern’s guidelines until the desired body size is reached.
- Adding Texture: For a simple scale effect, single crochet in back loops only (BLO) for several rounds in the midsection of the fish.
- Insert Safety Eyes: Place the safety eyes between certain rounds of the head. Ensure they are symmetrical and secure the backings.
- Stuffing: Gradually fill the body with stuffing material as you near the closer of the body. Take care not to overstuff, as this can impact the final shape.
- Closing the Body with the Tail: Finish shaping the body with decrease rounds. Then, crochet the tail directly onto the body in a series of chains and tailored stitch patterns that expand and contract to mimic the graceful curves of a fish’s tail fin. Work through both layers at the tail’s base to connect it without sewing.
- Fin and Flippers: Crochet the top fin and side flippers onto the fish directly, using combinations of crocheting double crochets, chains, and slip stitches, directly attaching them to the body.
- Weaving in Ends: Secure all loose yarn ends by weaving them into the body of the fish to maintain a neat finish.
By following these steps, you'll have crafted a delightful crochet fish amigurumi, created with the joy of seamless construction, ready to swim into the hearts of anyone who holds it.
Easy No Sew Crochet Fish Tutorial
Creating a no-sew crochet fish amigurumi offers a fun and simple project for both beginners and seasoned crafters alike. With just a few basic materials and some simple crochet techniques, you can bring to life a delightful little aquatic companion. Perfect for adding a touch of whimsy to your collection, these crochet fish can also serve as charming companions to other amigurumi creations, such as mermaids.
The process involves crocheting separate parts – the body and the fins – and then bringing them together into a cohesive form without any sewing, making it a quick and satisfying project to complete.
Materials Needed:
- Yarn (Premier Parfait Chunky suggested for a fluffy finish)
- 4 mm Crochet Hook
- Yarn Needle
- 13 mm Safety Eyes
- Stitch Marker
- Scissors
- Stuffing
Abbreviations Used:
- ch: Chain
- sc: Single Crochet
- inc: Increase (two sc in one stitch)
- dec: Decrease (sc two stitches together)
Making Process of the No-Sew Crochet Fish Amigurumi:
Fins (Make 2):
- Start with a magic circle.
- Place 6 sc into the magic circle, close it, slip stitch into the first sc, chain one, then cut the yarn leaving a tail for later use.
Body:
- Begin with a magic circle, 6 sc into the circle.
- Round 2: Increase (2 sc in each stitch) around to get 12 stitches.
- Round 3: Sc around (12 sc total).
- Round 4: [1 sc, 1 inc] repeat 4 times (16 sc total).
- Round 5: Sc around (16 sc total).
- Attach Fins: Position the first fin against the body where you want it; using the next two stitches on the body, crochet through both the body and the fin to attach it. Make sure fin tails are tucked inside the body. Repeat for the second fin, ensuring an even placement on the opposite side.
- Round 6-9: Continue sc around, adjusting for and securing the fins during round 6, then place safety eyes between rounds 3 and 4. After round 9, start stuffing the fish.
- Round 10: Decrease 6 times to close the body, then flatten the opening and use sc to stitch the opening closed.
Tail:
- Chain 1 and turn your work. Make three increases in the next round to start forming the tail.
- Chain 1, turn again, and make 6 increases in the next row.
- Chain 1 to fasten off, leaving a long tail to weave in ends.
Top Fin (Optional):
- Attach yarn to the desired spot on top of the fish’s body (about round 6), pull through, and chain 1.
- Place a sc in the same spot and a single crochet in each of the next two rounds, decreasing in heights such as sc in round 7 and slip stitch in round 8. Chain 1 to fasten off.
Weave in any remaining ends to finish your crochet fish amigurumi. You now have a delightful, no-sew crochet fish amigurumi, ready to accompany mermaids or brighten up any space with its handcrafted charm!
Crochet Fish Keychain
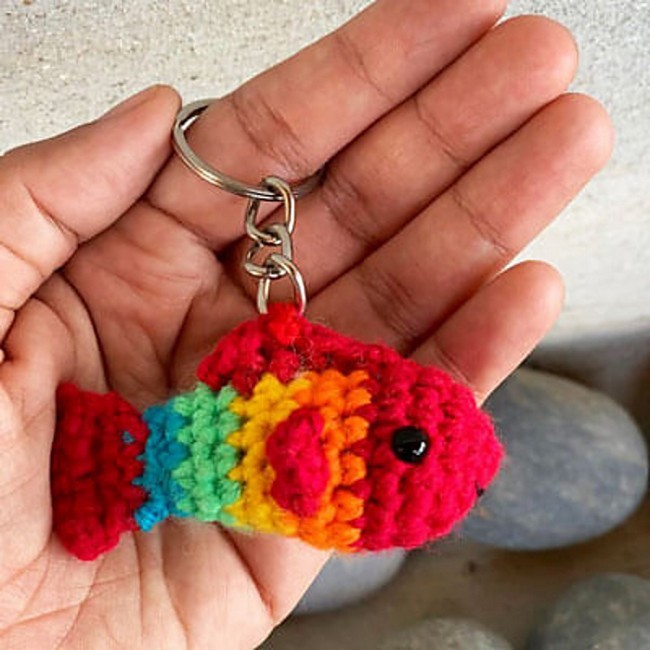
This crochet fish keychain is a fun and easy project for adults and children alike. And with all the uses you can have for it, you'll be making one for everyone in your life. The Fish Keychain is a cute project that you can do in almost any color scheme. It's a simple, fun pattern that can make the perfect addition to your car keys, backpacks, diaper bags, or anywhere else you need some cute school spirit!
Perfect for ocean lovers and those who appreciate handmade treasures, this pattern allows you to create a vibrant, rainbow fish that brings a splash of joy and color wherever you go. Designed as a no-sew project, this crochet fish is surprisingly easy to make, requiring only the crochet hook to integrate the fins directly into the body, simplifying the process and making it a great project for on-the-go crafting.
Materials Needed:
- DK Yarn in five colors
- 2.75mm Crochet Hook
- Tapestry Needle
- Stitch Marker
- Polyfill Stuffing
- Two 6mm Safety Eyes
- Keychain Ring
Abbreviations Used:
- Ch: Chain
- SC: Single Crochet
- INV DEC: Invisible Decrease
- INC: Increase (two SC in the same stitch)
- DC: Double Crochet
- TR: Triple Crochet
Making Process of the Crochet Fish Keychain:
Body:
- Start with C1: Create a magic circle with 5 SC. Continue with rounds as follows:
- Round 2: INC in each stitch around (total 10).
- Round 3: (SC, INC) five times (total 15).
- Rounds 4-5: SC around (total 15). Stuff as you go.
- Switch to C2: Insert the safety eyes between Rounds 4 and 5, about 6 stitches apart.
- Rounds 6-7: SC around (total 15).
- Switch to C3 for Rounds 8-9, to C4 for Round 10-11, and to C5 for Rounds 12-13, decreasing as described to shape the fish.
- Perform a slip stitch to position yourself at the bottom of the fish's body for tail creation.
Fish Tail:
- Change to C1. Fold the opening closed, ch one, and make 3 SC through both layers. This closes the body.
- Work in rows to create the tail – starting with INC, SC, INC, then another row of increases to form the tail shape.
Pectoral Fins (make 2):
- Using C1, slip stitch two stitches below the eye, perform 3 DC in the next stitch for volume, and slip stitch in the next. Repeat on the other side for the second fin.
Dorsal fin:
- Attach C1 between Rounds 5 and 6 at the top of the fish. The sequence for the dorsal fin is SC, DC, TR, DC, slip stitch.
Finishing Touches:
- Embroider a smile on your fish.
- Attach the keychain ring to the dorsal fin area by incorporating it as you make the triple crochet stitch.
This no-sew crochet fish keychain pattern is a small yet impactful project, ideal for using up scrap yarn and bringing bits of joy to your daily routine.