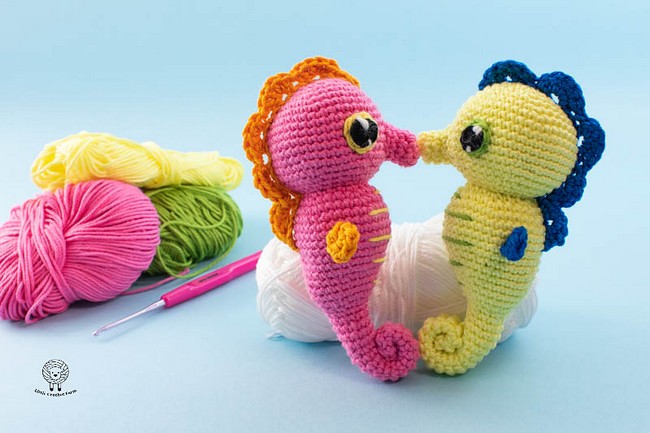
Get ready for some sea-sational fun because making a crochet seahorse is an awesome project. We've got super easy patterns to help you create cute little seahorses that will make everyone say "wow!" They're perfect to add to your crochet critters, and guess what? Making them is just as fun as they look. Our guide has a bunch of seahorse patterns that are just waiting for you to try. You'll be swimming in happiness when you see how elegant your new seahorse buddy turns out.
Cute Crochet Seahorse Patterns
Easy Crochet Seahorse Pattern
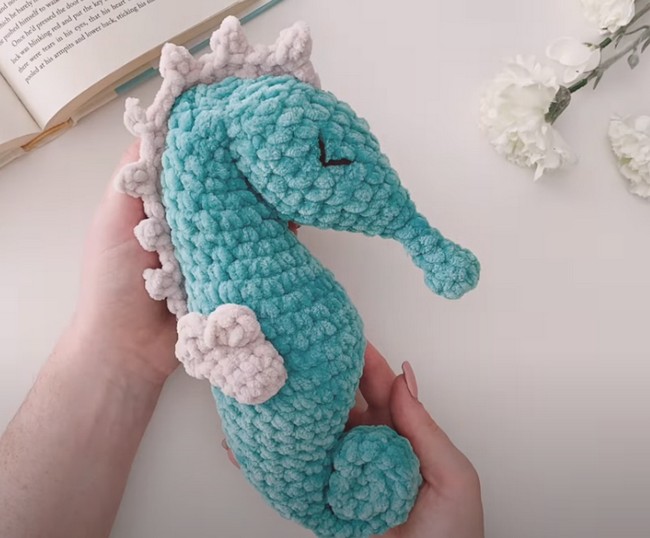
Let's create your very own amigurumi seahorse following this video tutorial. This charming project is perfect for intermediate crocheters or anyone looking to try their hand at crafting a cuddly sea creature. You'll shape the seahorse's body, curving its tail, and fashioning its distinct head spikes and fins, all while ensuring a pleasant texture that makes it irresistible to the touch.
Materials
- Yarn in two colors (Color A for body, Color B for details)
- Crochet hook (size appropriate for your yarn)
- Darning needle
- Fabric pins
- Scissors
- Stuffing material
- Safety eyes (optional)
Abbreviations
- ch – chain
- sc – single crochet
- dc – double crochet
- sl st – slip stitch
- picot – picot stitch
Making Process
Head and Body Shaping:
- Create a slip knot and chain stitch to start the base of the head.
- Continue to fashion the head and body according to the desired size.
- Tie off the end securely, leaving a tail for sewing parts together later.
Attaching the Head:
- Use a darning needle threaded with a yarn scrap to attach row 12 of the head to row 22 under the neck, ensuring proper placement.
Fixing Gaps:
- Sew up any visible holes where the stuffing shows, ensuring a neat finish.
Tail Curving:
- Roll the tail section up to the body and stitch securely in place.
Head Spikes:
- Using Color B yarn, chain 25, then follow the pattern, alternating single crochet and picot stitches across the chain.
- Securely sew the completed spikes onto the head between rows 13-15.
Fins:
- Start each fin with a magic ring and single crochet eight stitches inside the ring.
- Repeat single crocheting for four rows, then fold the piece and add three double crochets on the folded edges to form the fin's ruffled edge.
- Attach to the body angled slightly upwards, around rows 32-34.
Eye Detail:
- If you've opted for embroidered eyes instead of safety eyes, stitch them in place around row 10, adjusting their look to your preference.
By following these steps, your crochet seahorse will gradually take shape, becoming a keepsake or a gift filled with personality and charm.
Easy Crochet Seahorse Square
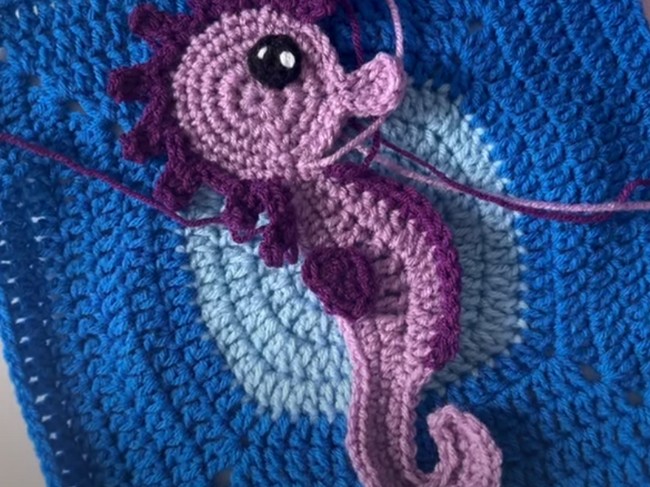
Explore the charming world of crochet sea creatures with the enchanting Crochet Seahorse Square Pattern. Stitched onto a serene water bubble square, this purple seahorse brings a touch of the ocean's mystique to your handmade creations. Whether you make them as part of a grand sea-themed blanket or as standalone pieces, the versatility of the seahorse pattern allows for a fully reversible design when pieced together with other squares.
So gather your shades of purple yarn and head on to this underwater crochet adventure!
Materials Needed:
- Red Heart Super Saver Yarn (Colors: Dark Orchid and Orchid)
- Size H Crochet Hook
- Scissors
- Yarn Needle
Abbreviations Used:
- ch: Chain
- sc: Single Crochet
- hdc: Half Double Crochet
- dc: Double Crochet
- tr: Triple (or Treble) Crochet
- sl st: Slip Stitch
Making Process Summary:
- Head & Snout: Start with a magic ring and work single crochets (sc) to form the head. Increase stitches in the following rounds to shape the head further. Create the snout with chains and a mix of stitches before rejoining the head with slip stitches (sl st).
- Body: Extend a chain from the head and proceed to shape the body, gradually changing from single crochets through to triple crochets to form the seahorse’s belly bulge, then returning to single crochets.
- Tail: Continue down to create the tail, employing increases to make it curl. Use slip stitch decreases on the opposite side of the tail to enhance the curving effect.
- Back Spikes and Body Details: Once the main body is formed, you'll add spikes along the back using the darker yarn. Space them evenly and create each spike using a series of chains and single crochets. Add some textural detail to the belly section by joining the darker yarn and alternating between single crochets and half double crochets.
- Fin and Eye: The fin is created with a small magic ring, using a combination of single and double crochets to create a fin shape that resembles a heart. Make the eye with another magic ring and black yarn, finishing it with a touch of white for the sparkle.
- Finishing: Fasten off all parts, leaving tails long enough for sewing. Attach each element onto the water bubble square, ensuring the seahorse's body is lined up neatly. For a reversible square, be mindful of stitching neatly to keep the reverse side presentable.
Crochet Seahorse Amigurumi For Beginners
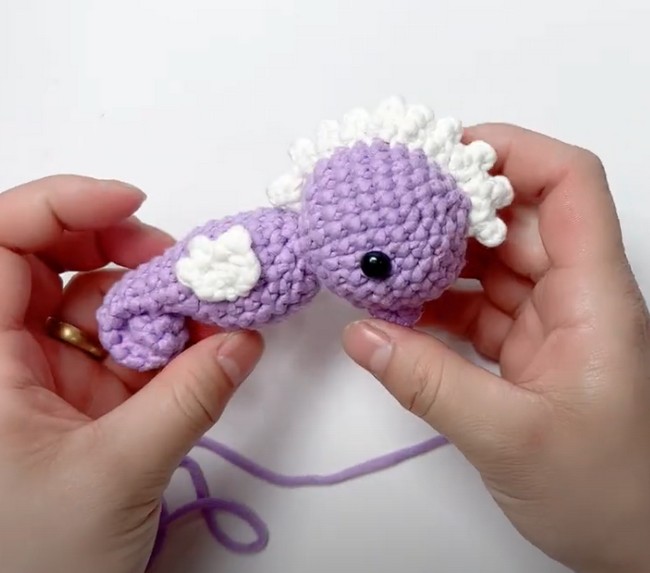
Explore the world of amigurumi with this beginner-friendly crochet seahorse project. In this pattern, you'll start with the fundamental magic ring and work your way through simple single crochet stitches to bring your seahorse to life. The process is soothing, with easy-to-follow increases that help shape the character of this adorable sea creature. This project is not only an enjoyable introduction to crochet toys but also a satisfying way to practice and enhance your crochet skills.
Materials
- Crochet yarn in your chosen color
- Crochet hook (size suitable for your yarn)
- Yarn needle
- Stitch marker
- Scissors
- Stuffing material
Abbreviations
- ch – chain
- sc – single crochet
- inc – increase (two single crochet in one stitch)
- sl st – slip stitch
Making Process
Start with a Magic Ring:
- Make a magic ring and secure it with a chain.
- Work 6 single crochets into the ring.
First Few Rounds:
- Increase the stitches according to the pattern by doing single crochets and appropriate increases in each round to start shaping the seahorse.
Tail and Body:
- Continue working in the round, following the pattern, to elongate the tail and body of the seahorse.
- Use a stitch marker to mark the beginning of each round and move it up as you go.
Filling and Finishing:
- As you crochet, stuff the body and tail firmly to give your seahorse its three-dimensional form.
- Slip stitch to join the end of each round, creating a seamless look.
This seahorse amigurumi pattern is not only manageable for beginners but will also result in a delightful marine-themed stuffed animal that is sure to charm anyone who sees it.
Mini Seahorse Pattern
The mini seahorse is the perfect project for a beginner because it is small and straightforward. This pattern will allow you to immerse yourself in crocheting without struggling with instructions and large pieces. The mini seahorse also makes a great handmade gift idea for anyone who loves sea animals. This adorable crochet project makes a great baby blanket or a gender-neutral afghan for your child's room. The process involves crocheting the seahorse amigurumi first and then incorporating it into a square background, allowing for customization in colors and textures to match any decor.
Materials:
- 2mm crochet hook
- 3ply 100% cotton yarn in 3 different colors
- Stuffing material
- Scissors
- Sewing needle
- Embroidery thread or safety eyes
Abbreviations:
- sc: Single Crochet
- inc: Increase (2 sc in the same stitch)
- dec: Decrease (sc 2 together)
- blsl: Back Loop Slip Stitch
- FL: Front Loop
- hdc: Half Double Crochet
- dc: Double Crochet
- sl: Slip Stitch
- rnd: Round
- skp: Skip
Making Process:
- Body: Start with light green yarn. Begin with a magic ring, then continue through rounds increasing and decreasing at specified intervals to shape the seahorse body. Remember to work in single crochets unless otherwise noted, and follow the pattern through to create the curled tail.
- Nose: With light yellow yarn, start with a magic ring and proceed to rounds of increases and simple crochet to shape the nose. Fasten off after the specified rows.
- Top Fin: Using blue yarn, chain and follow the pattern to create ripples indicative of a fin. Attach at the appropriate place on the back.
- Side Fins: With the same blue yarn, work in hdc within a magic ring, join, and fasten off. Make two of these for each side of the body.
- Eyes: Begin with black yarn in a magic ring transitioning to green, creating slip stitch increases to form the eye shape. Secure and embroider or attach safety eyes as preferred.
- Assembly: Position and sew each component onto the body according to the pattern specifications. Add embroidery or other features to enhance the seahorse's face and body.
- Square Background: Once the seahorse amigurumi is complete, crochet a square background of the desired size. Attach the amigurumi to the square securely, ensuring it's centered.
This crochet seahorse square pattern is incredibly versatile, allowing for a high degree of personalization in choosing colors and yarn textures. It’s a great way to bring a bit of oceanic charm into your home decor or to gift someone who shares an affinity for marine life.
