Hey, DIY fellas, explore this series of DIY wood lantern ideas with us and make some remarkable and impressive masterpieces for your home decor. Whether for gift-giving wedding decor, home settings, or porch stylizations, these lantern ideas suit well with almost every theme. So, if you want to spread the mood lights into the special corners of your home or want a rustic vibe anywhere, making these wooden lanterns will be a beneficial option.
Best DIY Wood Lantern Centerpieces

The lanterns were a part of ancient royal stylization, especially when they were the only source of taking light along with you. But nowadays, they are associated with a sense of stylization and elegance. For example, if you wanna greet the person at your doorstep or want to host a party at any special occasion a moody source of light with the beautiful wooden structure will make it more special.
All you have to do is get the supplies like:
- Wooden Base
- Wooden Stripes
- Added Hook
- Source of light (battery-operated candle, lights )
Spread DIY magic and turn any area into a lavish and royal space. You can use the DIY wooden lanterns for a number of other uses:
- To give as a gift
- To greet loved ones at the doorstep
- For updating the outdoor ambiance after a few days
- To make any decoration setting look unique
Different Possibilities For Wooden Lanterns:
If you're making a taller lantern, add pumpkins on the sides or go with the Halloween theme color to make it look like a personalized November decoration option. Or if you're going with shorter-sized wooden lanterns like one used to keep on the dining table or at the side tables. You can put some beautiful ribbons, embellishments, a touch of greenery, a source of light, and many other options to make it fit the vibe of the surroundings.
However, hanging a handmade lantern right on the top corner of your home is still a stunning option; for this purpose, you can make the smaller-sized lantern I presented below. It's just a simple 3D wooden structure like a rectangular cage with sides open to spread lights around; add a solar light into it and get rid of charging and replacing batteries; it will go long for years and always be remarkable for anyone who sees it.
How To DIY Wood Lantern

Lanterns were prominent in ancient decorations and are also on trend nowadays because they provide mood lights to any indoor or outdoor, especially if you have a hanging lantern like this one.
It's made using the simple materials like:
- Drill and drill bits
- Wood (¾" pressure treated wood, 1 by 6 deck-board were used)
- Screws (10 trim screws of 1.5" per lantern)
- Eye hook (1")
- Solar light
- Pencil
- Measuring tape
- Miter Saw
You have to make a simple base for your lantern, 5 " by 5", and make four holes in all the corners of it. Then make the lengths for the sides of your lanterns to make a rectangular shape, and install the top of your lantern over those sides by drilling the screws. Lastly, add another wooden piece on top and an eye hook to hang the lantern. You can add the solar lights up to your needs and liking; hence, your wooden lantern has been done.
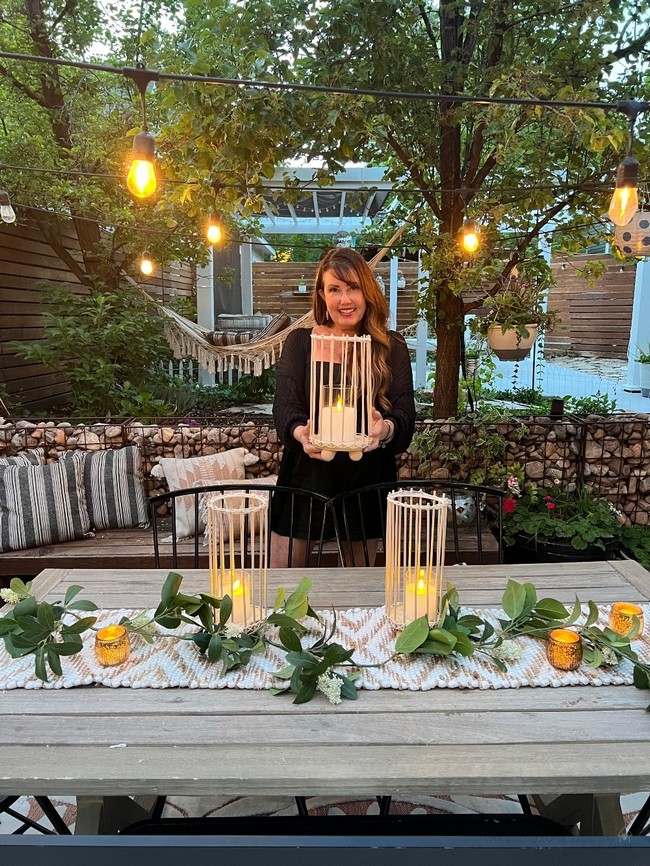
DIY Wood Lantern Centerpieces
Make some beautiful lanterns for the outdoors using the scrap wood around your storeroom. It's an easier project and can be done with a bit of woodworking skills, but the level of grace they add to your front door or home decor makes them a masterpiece to try.
First, you'll have to cut the wood into ¾" up to the height you want your lantern to be, then do some simple gluing and screwing, and you're done. The detailed guide is in the link below; the added hurricane glass for candle holders is completely optional. However, if you have specific weather conditions in your area, then using the respective wooden paint will help make your lanterns last longer.
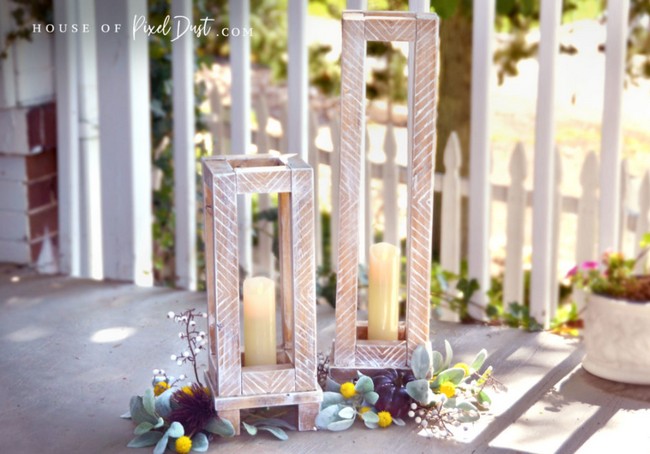
DIY Large Wood Lantern
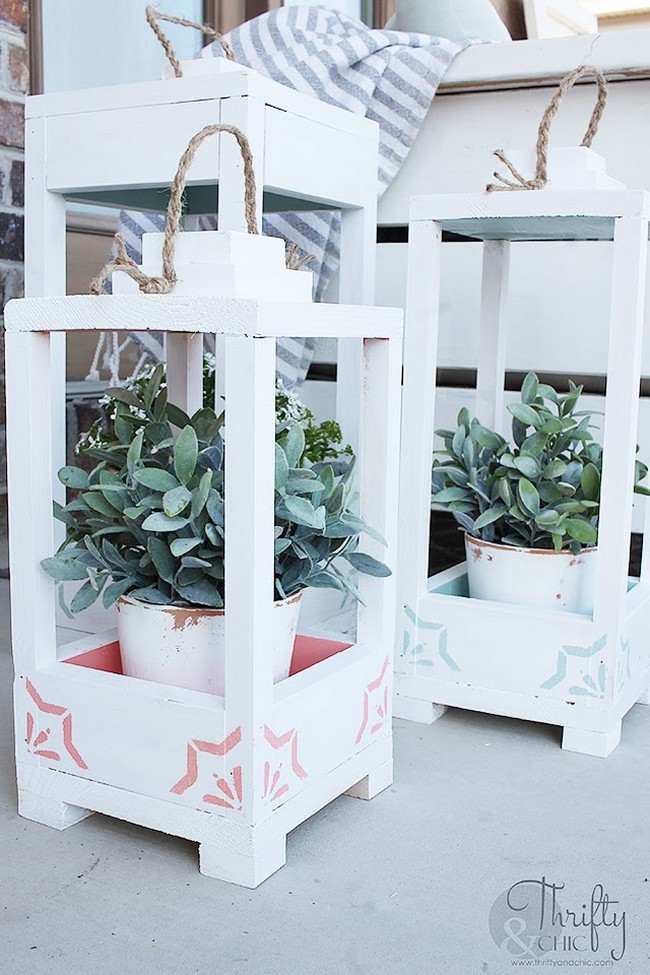
This amazing tutorial will show you how to make the best wooden lantern for outdoors in bohemian style for three amazing sizes following this stunning idea.
Start by cutting wooden dowels 1x10s for the larger size and 1x8s for the medium and smaller sizes. Then, secure the dowels vertically in the corners of your wooden base and nail them to make the structure of your lantern. Measure the difference between the dowel and cut 1x3s to keep it in the center. When the basic lantern is done, paint it whole in your favorite colors or the one suggested by the creator. You can add embellishment or attach handles with jute for easier transportation; these will surely be the best lantern you have ever made.
Material Need:
- Wood (sizes as per your desired lantern scale)
- Wood glue and/or 1 ¼" brad nails and nail gun
- DecoArt AmericanaDecor Outdoor Living Paint in Picket Fence, Wildflower, and Frosted Glass
- DecoArt AmericanDecor Mediterranean Tile Stencil
- Jute
- Staple gun
Dollar Tree Wood Lantern
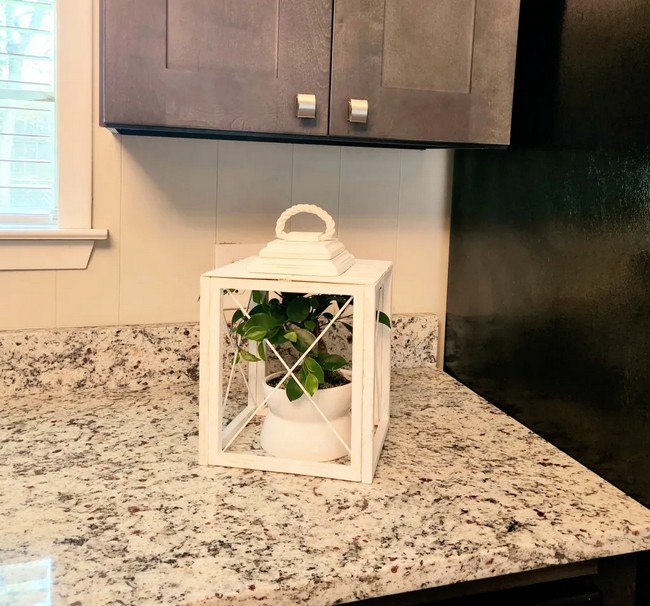
Let's make a beautiful, affordable lantern for your home decor using simple wood and other materials. It will cost only a few dollars, but the result will surely be loveable.
Materials You Need:
- 4 8×10 canvases
- Lightweight spackling
- BBQ skewers
- Acrylic or chalk paint in your color choice
- Paintbrush
- E6000 or Quick Grip
- Hot glue gun & glue
- Large popsicle sticks
- Large decorative wood plaque
- Smaller decorative wood plaque
- 2 mini Jenga blocks
- Zip ties (optional)
- Scissors and/or a utility knife
- Sandpaper
- Small piece of cotton rope or a decorative knob
You can start by disassembling your old canvas to bring the frames out, then use sandpaper to make it look smooth. Secondly, paint all your frames and glue them over each other to create a structure like a cube. Then, add the base of your lanterns as described by the creator. When the top is done, add a wooden stick to each corner of your cube to make it look more aesthetic and unique. Lastly, you can again paint the whole lantern for a more sleek look.
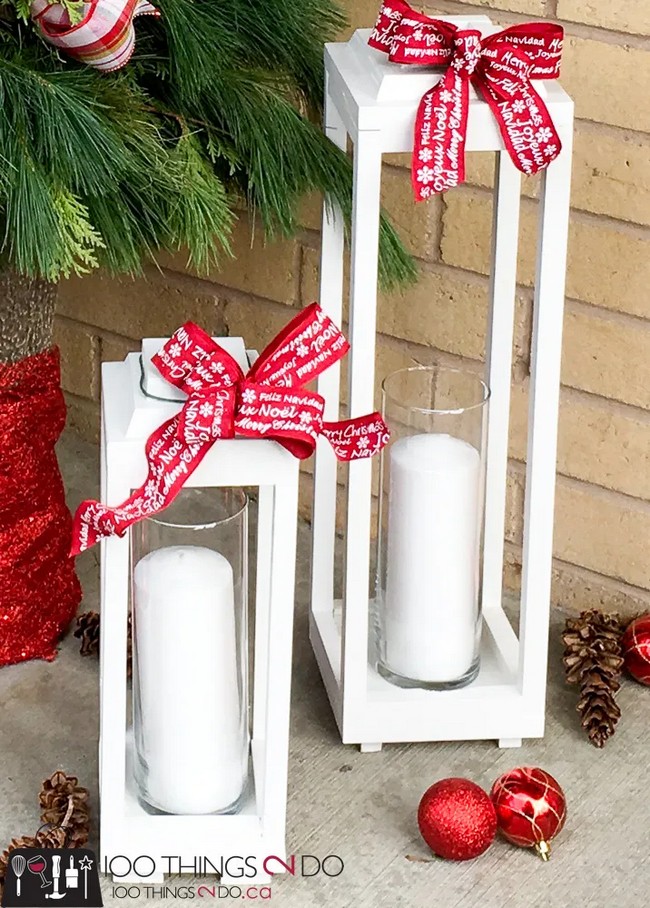
Metal Top DIY Lantern Makeover
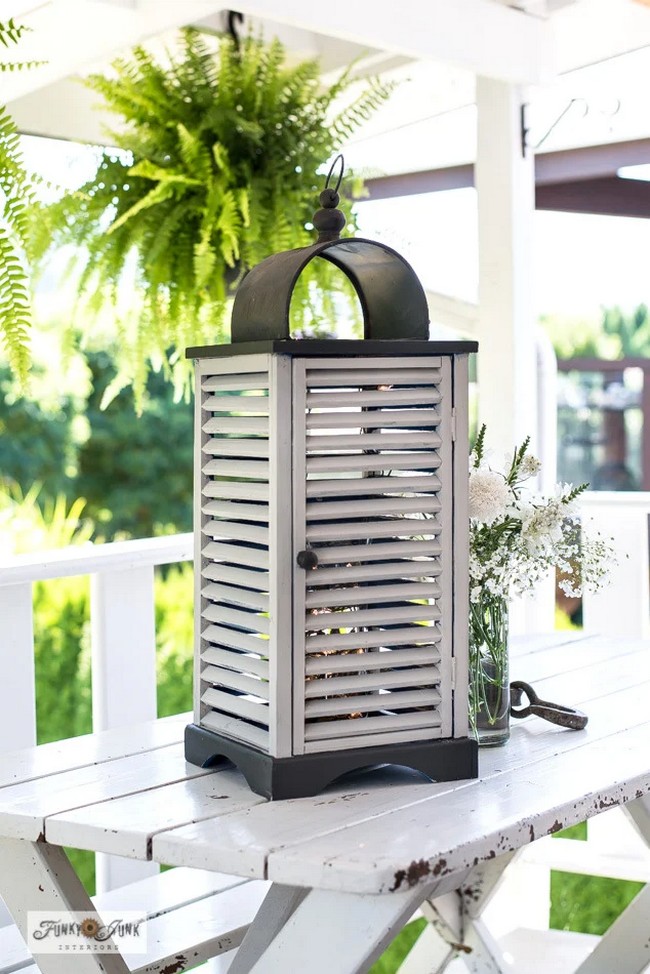
Update your old lanterns with a new look following this stunning makeover idea. Without much additional cost, you can do this recycling project; the whole procedure is quite easy. Start by cleaning the old paint, then repaint it in silhouette shade for a rustic vibe. Because of its vertical length, you can use a long glass vase inside to serve as your pillar candle holder. After doing all this, add mini night lights inside and make this lantern look unique and classy.
Materials Need:
- Wooden patio lanterns
- Homestead House Milk Paint in Silhouette
- Fusion Mineral Paint in Cast Iron
- Small chip brush
- Milk Paint mixing cup
- Small metal whisk
- Electric pressure washer
DIY Boho Wood Lanterns
This beautiful lantern can be yours with just a few pennies and DIY skills. If you're a decoration lover like me but want to spend something other than hard-earned dollars on it, following this guide will suit you. You'll have to visit the dollar store or hobby lobby for the materials.
You Need:
- Wood Base (preferably one 6″ and two 5″)
- Metal or Wood Ring
- Wood Dowels (18 per package)
- Natural cord
- Round wood feet (4 per lantern)
- Glass-enclosed battery-operated candle
- Hot glue and glue gun
- e6000 (optional but necessary if using lanterns outside)
Get the wooden base on hand, place the thin wooden dowels on its border, and glue them evenly and firmly. Then, use the twine for wrapping your metal or wooden wring. After this, you have to wrap the cord or macrame on the upper ends of your dowel, leaving one inch of space above, and wrap continuous layers of it. It will make the frame of your lantern. Then move to the down base of the dowels, and here you have to wrap the macrame, making an x shape while layering under and over the dowels; it will provide sturdiness to your lantern's shape. Later on, just put a glass-enclosed candle inside of it, and you're done to spread the DIY vibes and beautiful lighting around. You can use the round wooden feet to provide a stable landing for your lantern and keep it off the floor, too.
DIY Snowman Lantern
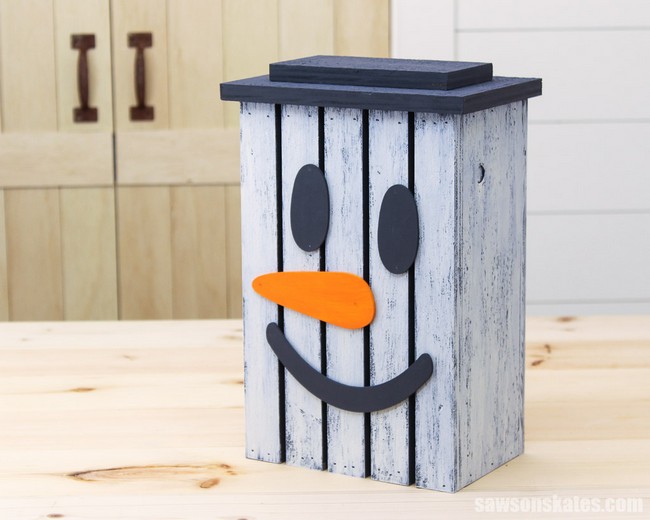
Spread some holiday cheer by making this amazing snowman lantern for your home decor. This beautiful lantern can be a dining table centerpiece or great to welcome a fellow or guest at the main door; you can trust this lantern for multiple reasons, and it will always be a great smile-spreading art piece. It will be the kid's favorite and also an excellent show-off for your mastery of wooden skills.
The materials you need for making this snowman lantern are:
- Pine boards (or you can use T1-11 siding or any other types of plywood)
- 3mm Plywood-like material for the face (e.g. lauan, hardboard)
- Flameless LED candles
- Paints - Charcoal Chalk-type Paint and White Craft Paint
- Adhesive
- Nail and Glue
Plus, the tools required are:
- Miter Saw
- Scroll Saw
- Brad Nailer and Pin Nailer
- Circular Saw and Jigsaw
Start by making a simple box using the length of wood, and make back and forth all the sides by following the diagram provided by the creator in the link below. You must keep a small hole-like access at the back of the box to slide the candles inside. After making the box, print out or draw the snowman face on rigid paper, place it on the 3mm plywood sheet, and trace the face using a pencil. Later on, cut it out, do proper sanding for smoother edges, and you're done. Lastly, you can paint your snowman face and nose in the dramatic colors above. However, adding a hatto to the top of this box will make it look more genuine. You have to cut the two pieces of wood and attach them with bard nails on the top.
Large Wood Porch Lantern Set
If you are curious that making lanterns is an extremely difficult wooden project and only done by expert woodworkers, then you need to be corrected. Because this amazing-looking lantern can be made entirely using glue gun magic. The hidden secret is that you must get all the pinewood precut, but it is still a worthy project and suits you well for beginners.
The materials you need are:
- 2×2 Pinewood 8ft long (x3)
- 1×8 Pinewood
- glue gun plus 5 to 6 glue sticks
- paint or stain
It's a complete gluing project, so you have to be specified with the cutting and measurements. Place four pieces of 1.5 inches underneath the wooden base and make the platform for your lantern. Then, use the larger 24-inch pillars to make a rectangular shape over the wooden platform and look like a decent 3D structure by gluing the top of the lantern together with a wooden piece between. After this, do proper painting staining and make the lantern suitable for the theme where you want to place it. This fantastic lantern will suit best for a fire mantle, as a centerpiece for front door decorations, and many more beneficial outcomes.
Farmhouse Chic Painted Wood Lanterns

Recycling and repurposing is always my favorite; if you're also into it, following this guide will be helpful for you. In this guide, the creator shows how to turn an old royal-style lantern into a decent welcoming masterpiece for your Halloween parties using simple steps.
All You Require Are:
- Wood Lantern
- Paint of your choice
- Scrub Brush
- The Zibra Fan Brush
- Zibra Square Brush
- The Zibra 2” Palm Pro Cut-In Brush
- Screwdriver
- Rag or towel (or painter’s tape if you want to tape off the glass)
- Paint scraper
- Optional: items to fill your lantern
Any lanterns you get on hand will suit you well, but this procedure will guide you about the one the creator finds. However, these are general tips that can be applied to others also. First, clean your lantern well, remove all the debris, dust, and other stuff from its surface, and then use the scrub brushes to make its surface plain and ready for paint.
Before painting, I suggest removing the related hardware and supplies that you want to paint differently, or if you're going to copy a specified theme, then keep that in mind. After painting the first coat, analyze thoroughly if another one is required. Later on, let the paint dry and use these lanterns for decorations. There is a tip: if you use a taller lantern, adding pumpkin may enhance its vibe, and if you're going with a smaller one, you can use different art pieces like ribbon and other stuff for decoration, too.
Dollar Picture Frame DIY Wood Lantern
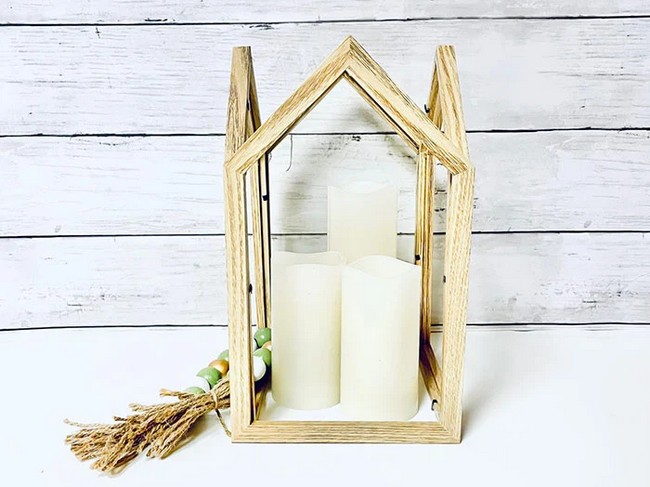
Let's make some of the cheapest and most amazing centerpieces for weddings, theme parties, and other celebrations with the simpler materials available at any dollar store. They cost almost nothing, but the degree of style and amiability they bring will surely be great to stun your family members and guests at home.
The materials required are:
- Four wooden, flat-on-the-side picture frames. The example uses house-shaped frames with a 4x6 opening size.
- A hot glue gun or E6000 adhesive.
- Battery-operated
Take four frames, glue them all side by side, put the battery-operated candles in, and you're done. You can add some other embellishments, too to make this lantern more admirable and unique.
Easy DIY Wood Lantern
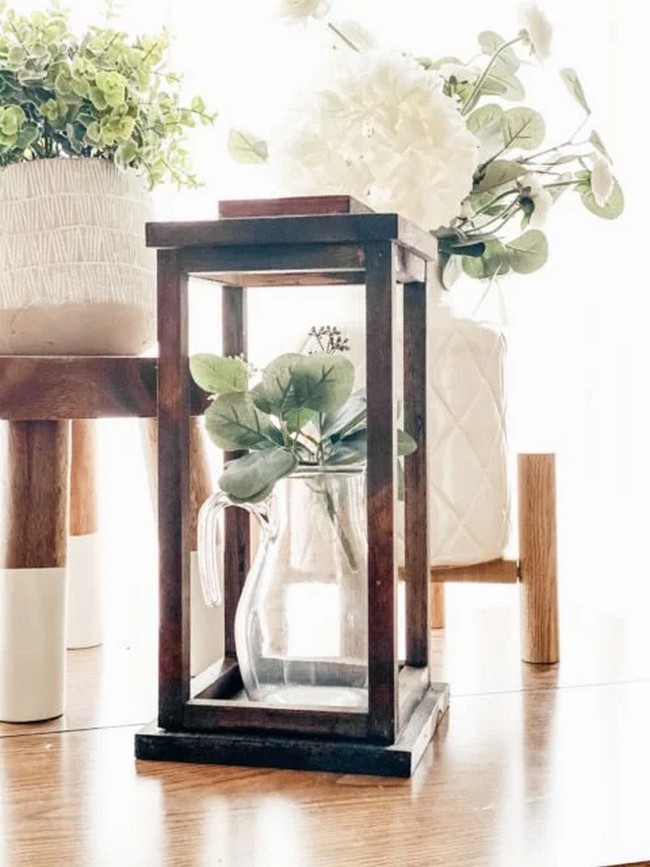
If you're not so good at woodworking but still want to DIY a lantern, following this amazing idea will benefit you. It can easily be used as a decoration option in various manners, like a wedding photo prop as a lighting source or to add holiday cheer to any decorations.
The supplies you need for making this lantern are:
- Miter Saw
- Rapid Fuse (wood glue)
- Finish Nailer
- Pine board 1"x 12"
- Dark Walnut Stain
Before starting, you have to cut the wood in specified measurements like:
- 1 - 8" x 8" square
- 1 - 7" x 7" square
- 1 - 4.5" x 4.5" square
- 8 rectangular strips - 5 ½" long x ¾" thick
- 4 rectangular strips
Begin with the base and add a short wooden strip and long wooden stip to make the L-shape. Then, add another longer stripe to create a U-shape and repeat the process for making a 3D Rectangle. Finish it off with a wooden board top, making it the roof of your lantern. Keep any of your favorite vases with flowers, or use a battery-operated candle to make it look like a fabulous masterpiece.
How To Turn Scrap Wood Into DIY Wooden Lantern
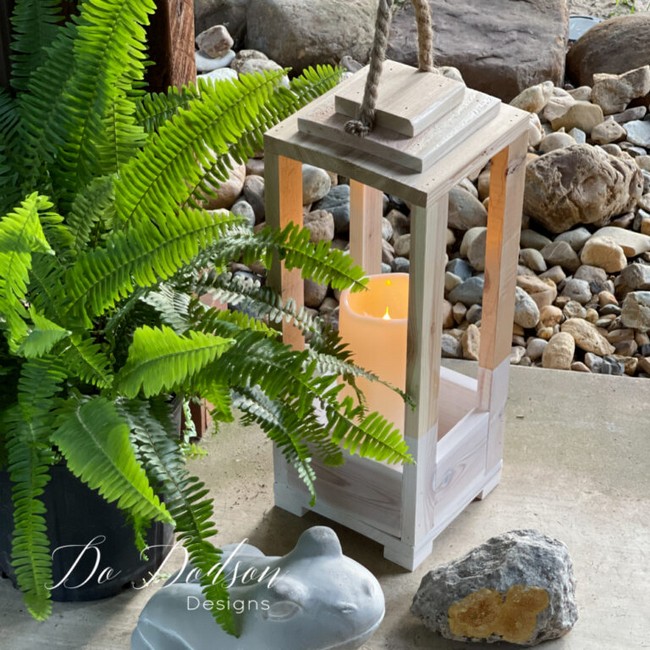
Are you in search of a masterpiece lantern that goes well with almost every vibe? Then, following this cheaper but unique wooden lantern will be the best option. It works well for wedding settings, outdoor embellishments, or to greet your guests at the porch entrance.
The materials include:
- scrap wood, pine, cedar, etc
- tape measure
- carpenter's pencil
- exterior wood glue
- sandpaper or sanding block
- nail gun
- pin nails
- miter saw
- table saw
- painter’s tape
- No Pain Gel Stain Picklin’ White (oil-based)
- Flameless remote-control candles
You can start by cleaning the scrap wood making and cutting it into ( 1x8, 1x4, 1x2, and 2x2 ) after preparing the wood, start assembling. Arrange the wooden square with tall pieces on its corner, glue them firmly, or add nails; it's up to you. Then, gently make the upper roof of your lantern by keeping the three wooden squares, reducing the size a bit each time. It will be the best woodworking project you have ever done. For uniqueness, go with a piece of jute rope on top for carrier and hanging.

You can also see:
- DIY Wall Sconce Ideas: Make some admirable masterpiece lighting options, indoor or outdoor, following our series of best wall-sconce ideas.
- DIY Wood Wall And Wall Art Idea: Add a touch of stylization and uniqueness to your home walls by getting inspiration from these amazing wood wall art ideas and designs.